
Installation files can be downloaded from the following locations on the internet
Windows: www.baptisthealth.net/citrixpluginWindows
Mac: www.baptisthealth.net/citrixpluginmac

Save the file (windows default location should be downloads) Or choose Save as and save the file to an location on the PC of your choosing
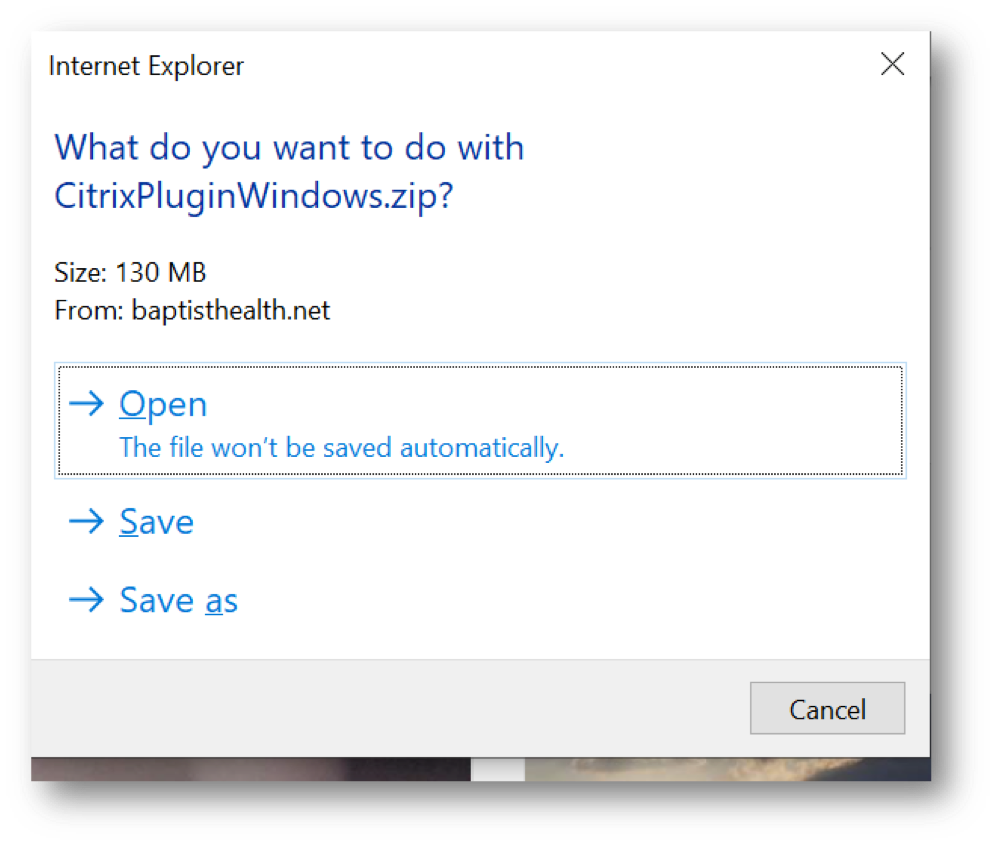
Notice the file downloading at the bottom of the screen. Allow file download to complete.

Open folder once download is completed

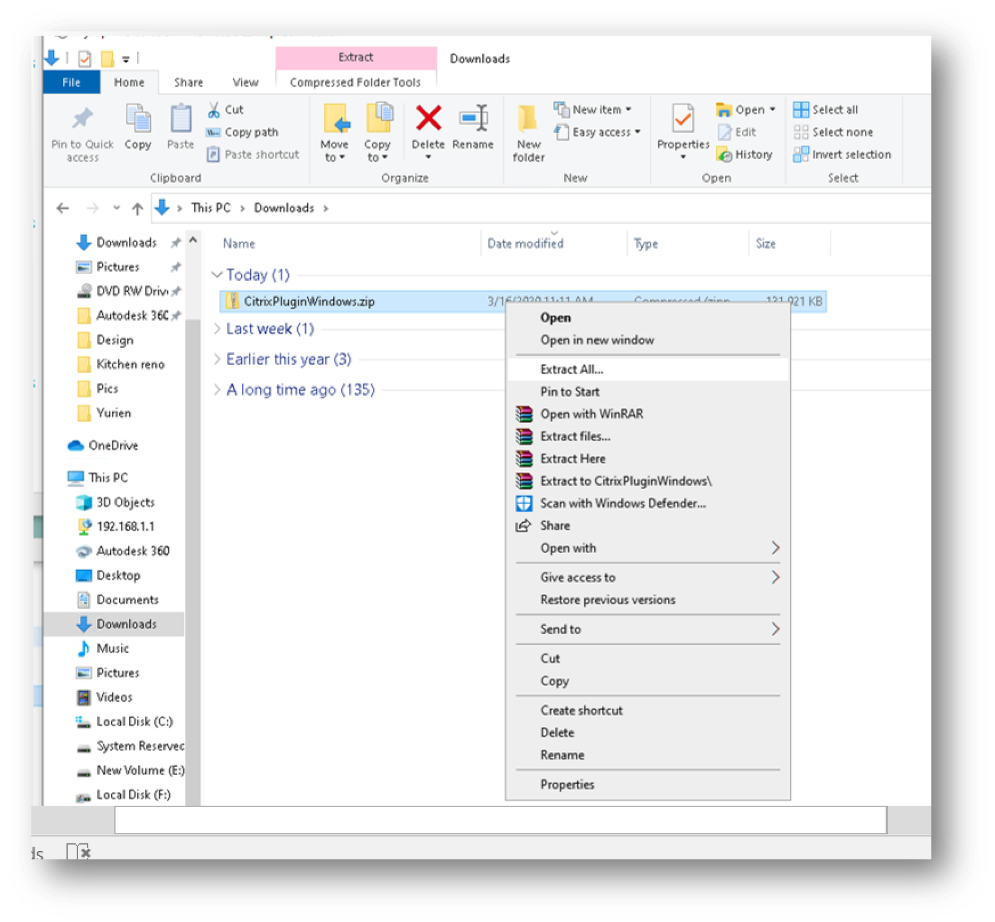
Go to the folder where the file was downloaded and select the downloaded file. The default name is CitrixPluginWindows.zip Select the file, Right click it, and choose to Extract all
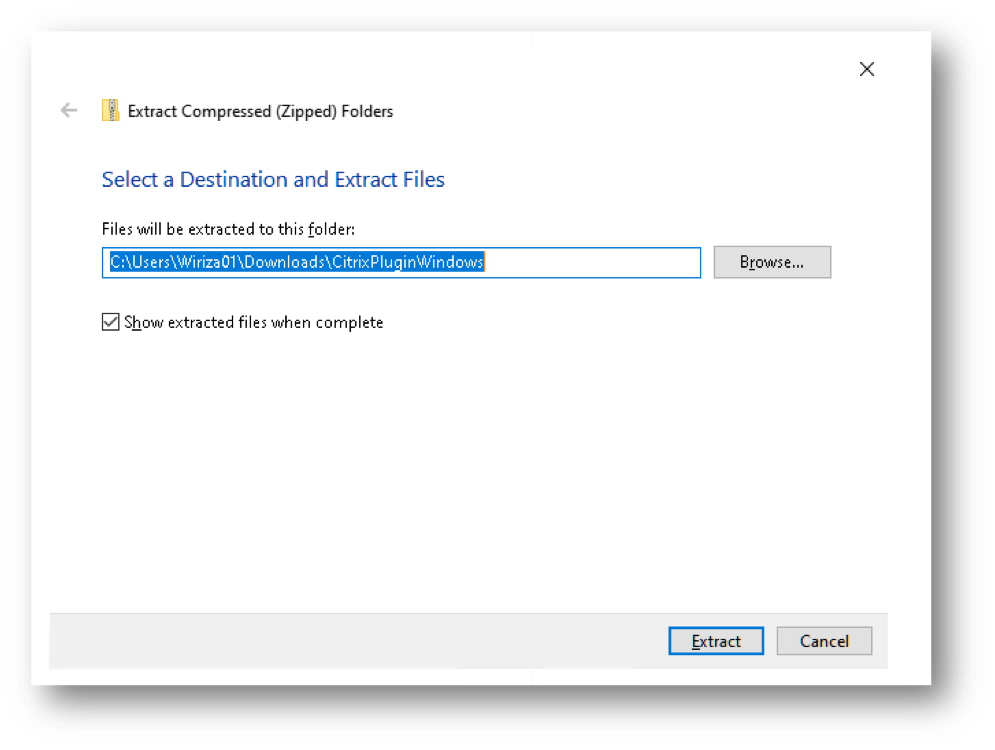
Extract the files. Ensure Show extracted files when complete is checked:
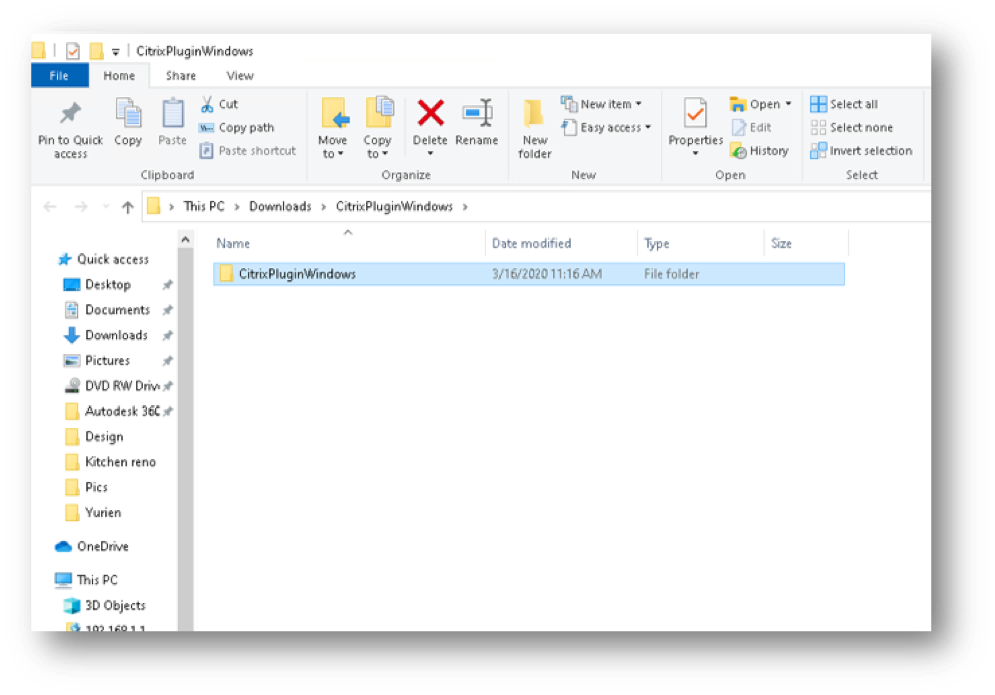
Open the CitrixPluginWindows folder by double-clicking the folder:
Double-click CitrixWorkspaceApp.exe installer as seen below to start the installation.

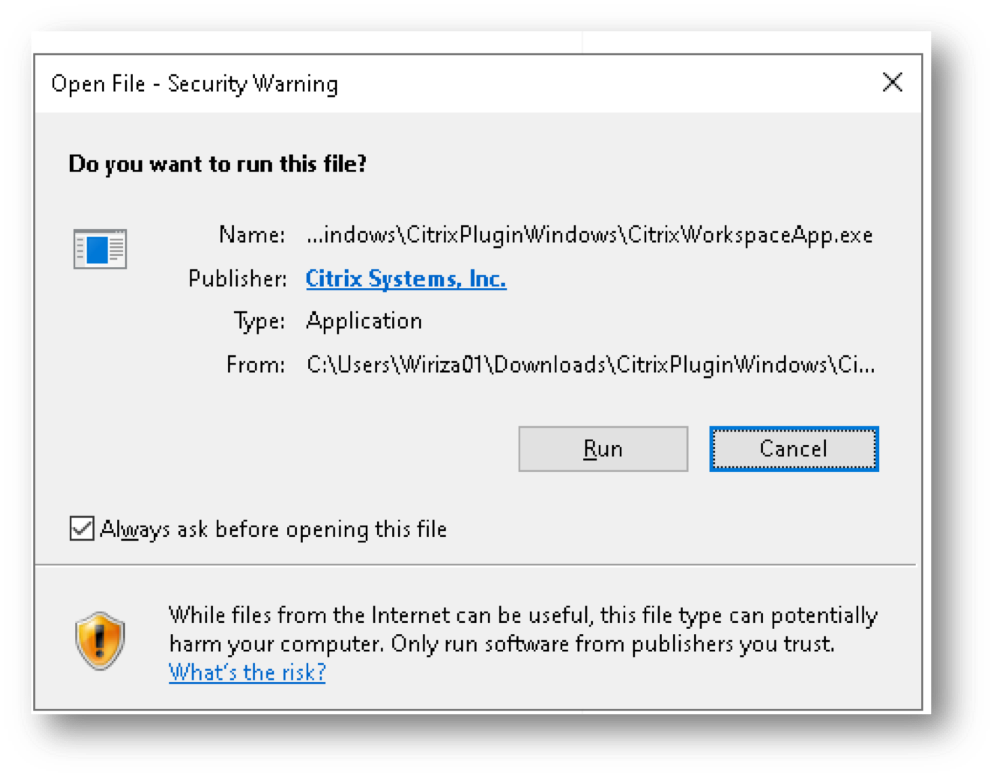
If prompted with Open file – Security Warning, select Run
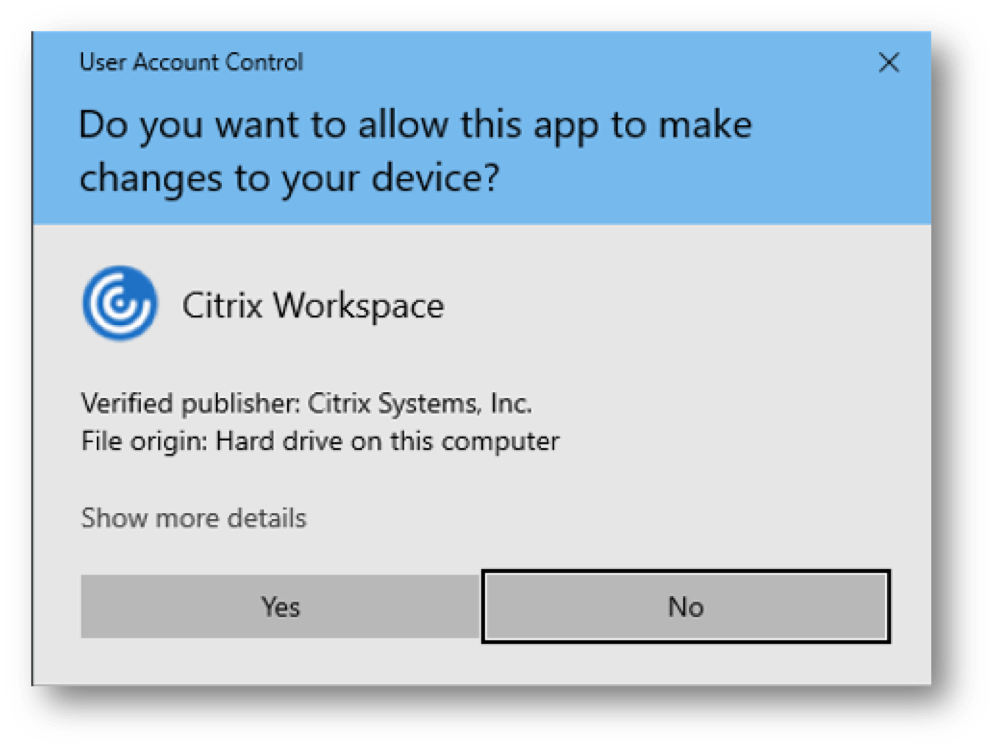
If prompted, to allow the App to make changes to your device, select Yes
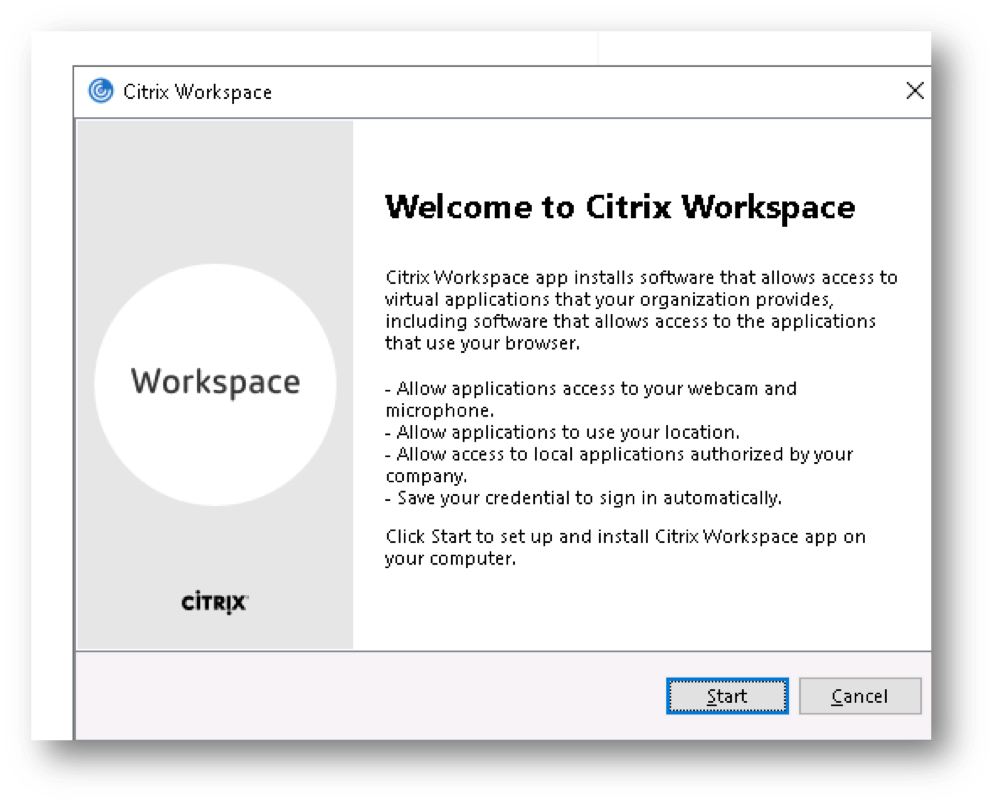
Select Start to begin Citrix Workspace installation:
Read /Accept Licensing Agreement and select Install

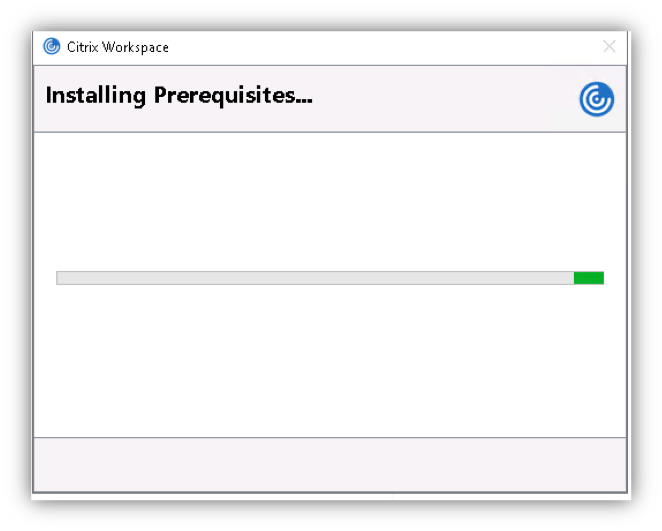
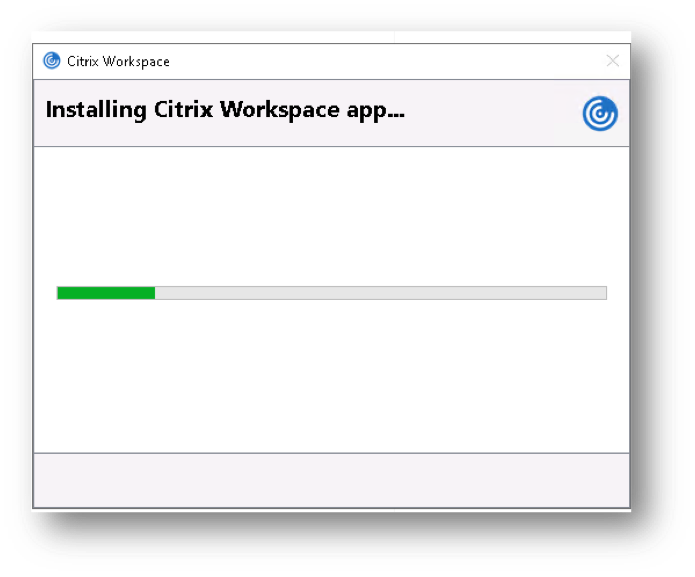
Citrix Workspace installation begins:
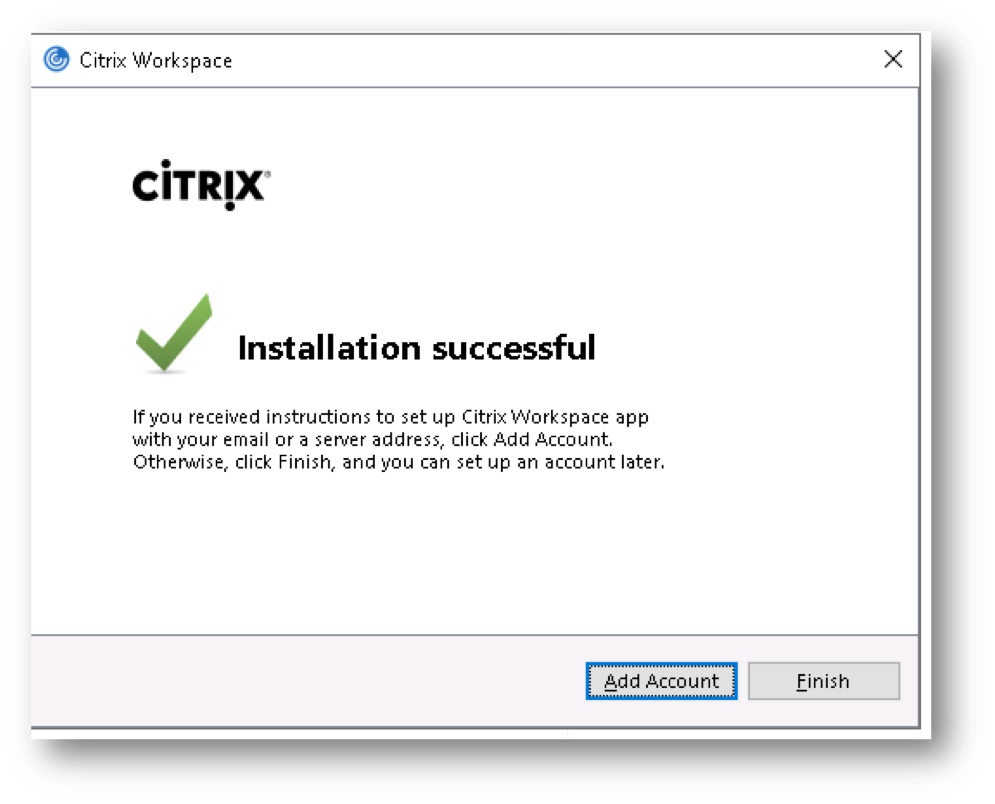
When the Citrix Installation completes, Press Finish (Ignore the Add Account button)
You will be prompted to restart the computer.
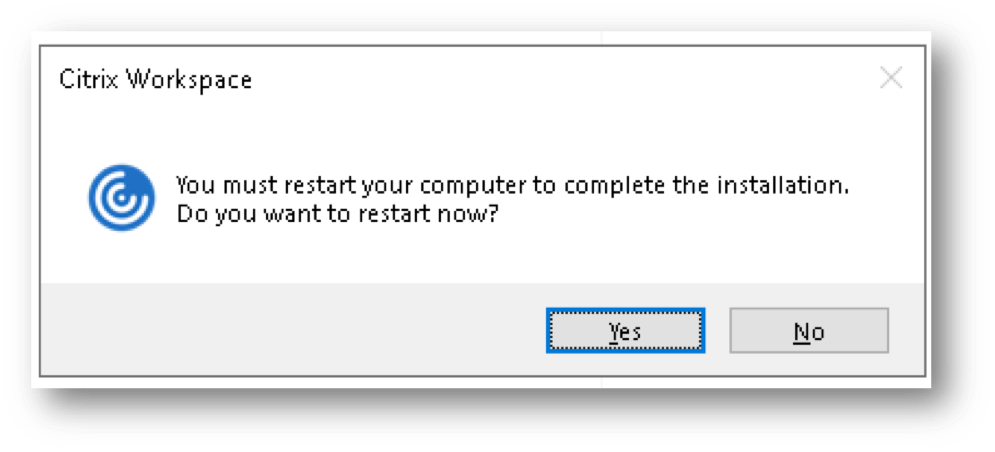
Ensure no files require saving to prevent loss of data, and press Yes when ready. The computer will restart.
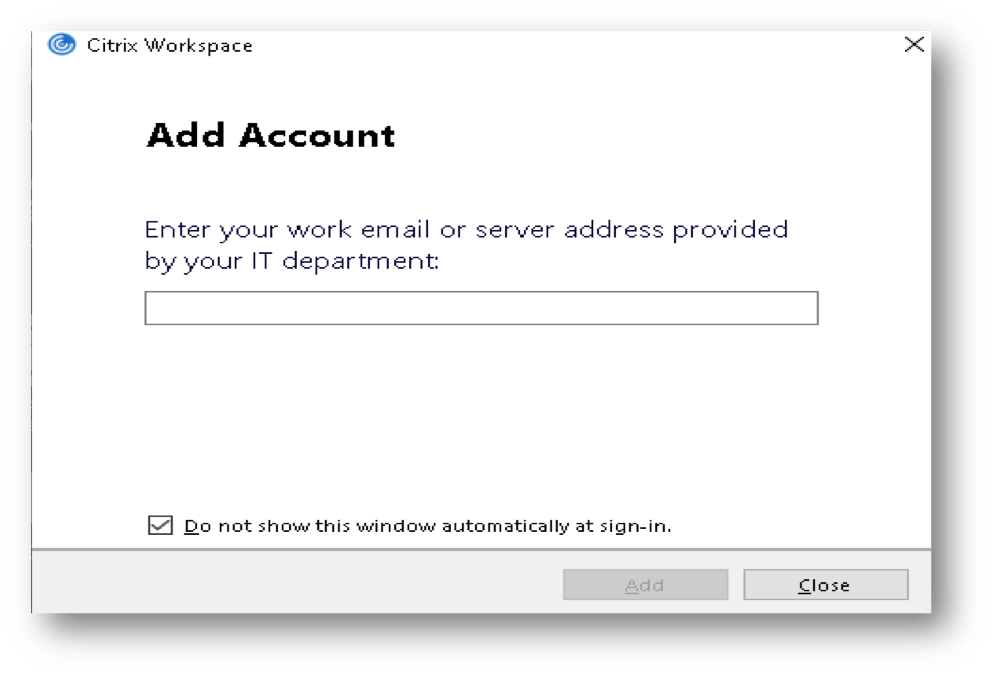
If after the reboot, you are prompted to Add Account, do NOT add account or store. Also, make sure Do not show this window automatically at sign-in is checked as seen below. Then click on Close.
KNOWN ISSUES
(1) Citrix published applications\session do not start when selected, because the .ica file extension was not properly association during the install.
Any of the following scenarios could be observed


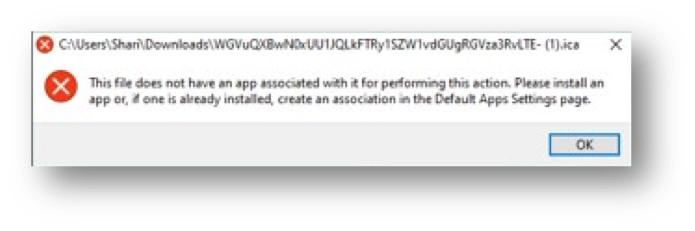
SOLUTION: Set files with extension .ICA to open with Citrix Workspace file wfcrun32.exe located in the C:\Program Files (x86)\Citrix\ICA Client folder
Steps:
1. When asked to Open or Save the random .ica file, Save it.
2. Locate the file with the .ica extension and right-click it
3. Select Open with...
4. Click More apps or Choose another app
5. Scroll to the bottom of the list and select "Look for another app on this PC"
6. Click on your C drive on the left side and then open the Program Files (x86) folder.
7. Open the Citrix folder, and then open the ICA Client folder
8. Double-click on the wfcrun32.exe application (be careful not to select the wfica32.exe application)
9. Click OK to confirm the association with the Citrix Client
10. Click Close to close the Default Programs window and then Close the Control Panel window
If the problem is not resolved, and for more information refer to https://support.citrix.com/article/CTX804493 for additional support.
(2) When attempting to launch a Citrix application or VDI session, you are prompted to Add Account or Store or URL

You will be prompted to restart the computer.